How to tie shoelaces
Follow our visual guide on how to tie shoelaces. You can also download the guide by following the link on the right.
How to tie shoelaces – a step-by-step guide
Step 1
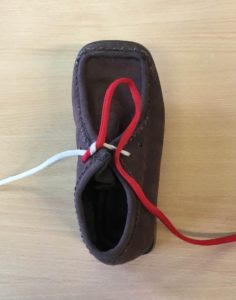
We have used two different coloured shoelaces to show the right and left hand laces.
Start with the white lace on the right hand side and the red lace on the left hand side.
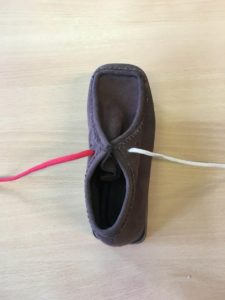
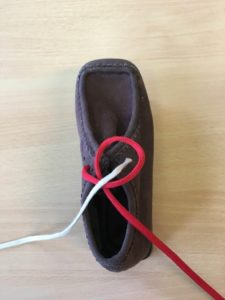
Step 2
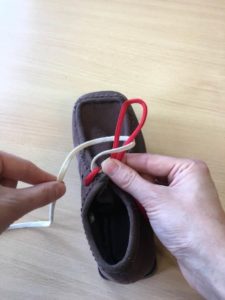
Cross the red (left hand lace) lace over to the right hand side beside the white (right hand) lace.
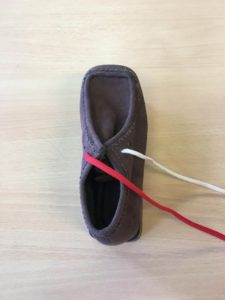
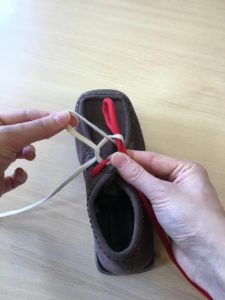
Step 3
Cross the white lace over to the left hand side to create an X.
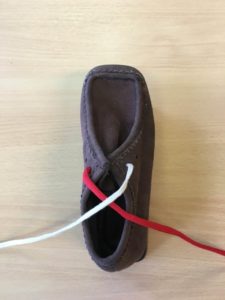
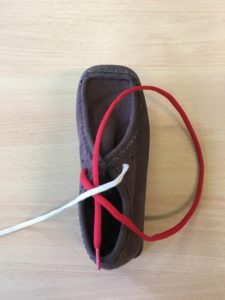
Step 4
Take the end of the red lace (with your right hand) and place it under the X (top to bottom).
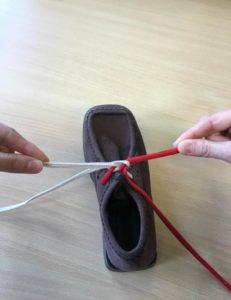
Step 5
Pull the red lace (with your right hand) and white lace (with your left hand) together at the same time.
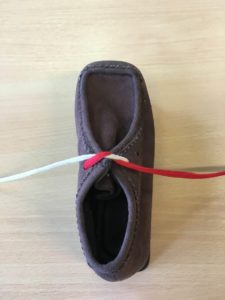
Step 6
Pull both laces tight.
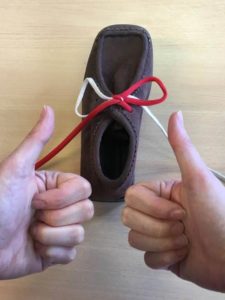
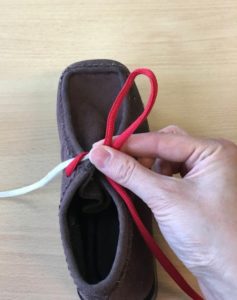
Step 7
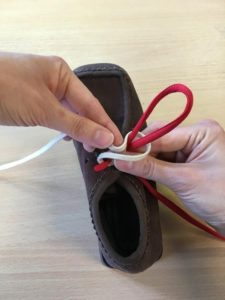
Make a loop (bunny ear) with the red lace about the size of your thumb.
Secure the loop with your thumb and index finger. Your fingers should touch the shoe.
Step 8
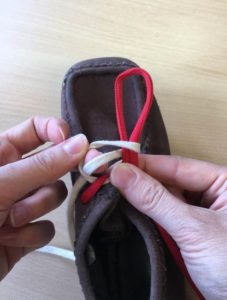
While still holding the red loop (bunny ear), pick up the white lace in your left hand and wrap it around the red loop (bunny ear) in an anti-clockwise way.
Step 9
When you have wrapped the white lace has been completely around the red loop (bunny ear), put the white lace down at the left side of the shoe.
Step 10
Using your index finger (pointer finger), push the back of the white lace (wrapped around the red loop (bunny ear) through the hole where your right thumb rests.
Step 11
Push the white lace through the hole and then pull the lace from the front to create another loop (bunny ear).
Step 12
Pull the new white loop (bunny ear) through the hole until it’s the same size as the red loop (bunny ear).
Step 13
Pinch both loops (bunny ears) and pull them together in an upwards and outwards motion.
Step 14
Well done!